
The Cen-Tech Digital Multimeter is a versatile, feature-rich device designed for precise measurements of voltage, current, resistance, and more. This manual provides essential guidance for safe and effective use.
1.1 Overview of the Cen-Tech Digital Multimeter
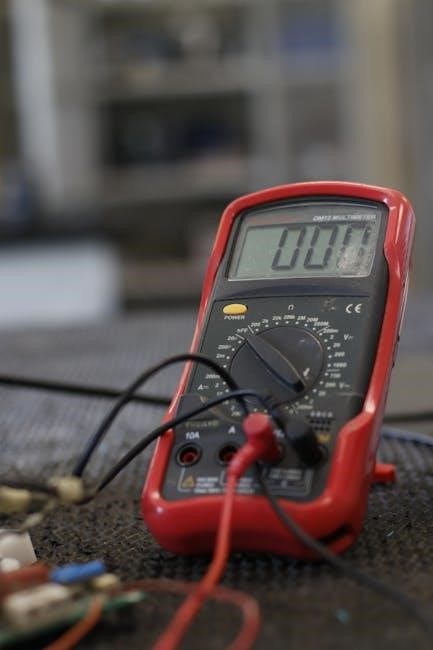
The Cen-Tech Digital Multimeter is a versatile and precise tool designed for measuring various electrical parameters, including voltage, current, resistance, and capacitance. It is available in multiple models, such as the 63758, 90899, and 98025, each offering a range of functionalities tailored for different applications. The multimeter features a user-friendly interface with a clear LCD display and intuitive controls, making it suitable for professionals and DIY enthusiasts alike. Additional functions include continuity testing, diode testing, and frequency measurement, enhancing its utility in troubleshooting and diagnostics. Some models also include advanced features like auto power off and audible continuity, ensuring efficient and safe operation. With its robust design and wide measurement ranges, the Cen-Tech Digital Multimeter is a reliable choice for electrical and automotive applications, providing accurate results for both routine and complex measurements. This manual will guide users through its proper use and maintenance.
1.2 Importance of Reading the Instruction Manual
Reading the instruction manual for the Cen-Tech Digital Multimeter is essential for safe and effective operation. It provides critical information on proper usage, safety precautions, and troubleshooting. The manual outlines key features, measurement functions, and technical specifications, ensuring users understand the device’s capabilities and limitations. Failure to follow the guidelines can result in inaccurate readings, damage to the multimeter, or even personal injury. The manual also includes warranty details and manufacturer support information, which are vital for resolving issues or obtaining assistance. By thoroughly reviewing the manual, users can maximize the multimeter’s performance, avoid common errors, and ensure compliance with safety standards. This guide is a comprehensive resource for both beginners and experienced users, offering clear instructions to optimize their experience with the Cen-Tech Digital Multimeter.
Safety Precautions
Always follow safety guidelines to avoid hazardous situations. Avoid direct contact with metal parts of test leads. Ensure the multimeter is switched off before opening. Use as specified.
2.1 General Safety Rules
Safety Precautions: Always handle the Cen-Tech Digital Multimeter with care to avoid accidents. Never touch bare metal parts of the test leads while measuring voltage or current, as this can cause electric shock. Ensure the multimeter is set to the correct range for the measurement to prevent damage or inaccurate readings. Avoid using the device in damp or wet conditions, as moisture can conduct electricity and pose a hazard. Do not measure voltage in situations where high voltages or currents are present, as this can result in serious injury or death. Keep the multimeter away from children and unauthorized users. Always turn off the power source before connecting or disconnecting the test leads. Use only the battery specified in the manual to avoid fire or explosion risks. Follow all instructions carefully to ensure safe and effective operation. Failure to comply with these rules may lead to injury or equipment damage.
2.2 Warnings and Cautions
Warnings and Cautions: To ensure safe operation, strictly adhere to the following guidelines. Never measure voltage or current beyond the multimeter’s specified limits, as this can damage the device or lead to injury. Avoid using damaged test leads or improperly connected probes, as this may result in inaccurate readings or electrical hazards. Do not attempt to measure voltage or current in wet or damp environments, as moisture increases the risk of electric shock. Always disconnect the test leads before opening the multimeter’s casing for battery replacement or maintenance. Never attempt to repair the multimeter yourself, as this can void the warranty and pose safety risks. If the device is dropped or damaged, discontinue use immediately and contact the manufacturer. Failure to comply with these warnings may result in serious injury, device malfunction, or voidance of the product warranty. Always prioritize caution when working with electrical measurements.
2.3 Proper Handling and Storage
To ensure the longevity and accuracy of your Cen-Tech Digital Multimeter, proper handling and storage are essential. Always store the multimeter in a dry, cool environment, away from direct sunlight and extreme temperatures. Avoid exposing the device to humidity or moisture, as this can compromise its internal components. Use a protective case or pouch to prevent physical damage during transportation or storage. When not in use, disconnect the test leads and store them separately to avoid accidental short circuits. Never touch the metal parts of the test leads or the multimeter’s terminals with wet hands or while standing on a conductive surface. Avoid dropping the device, as this may cause internal damage. For extended storage, remove the battery to prevent leakage and corrosion. Regularly clean the multimeter’s exterior with a soft cloth to prevent dust buildup. Proper care ensures optimal performance and extends the lifespan of your multimeter. Always follow these guidelines to maintain its reliability and safety.

Features and Specifications
This section details the advanced features and technical specifications of the Cen-Tech Digital Multimeter, including its measurement functions, range details, and additional diagnostic capabilities.
3.1 Key Features of the Cen-Tech Digital Multimeter
The Cen-Tech Digital Multimeter is a versatile tool designed for precision and ease of use. It offers multiple measurement functions, including voltage, current, resistance, capacitance, and frequency. The device also features a continuity test, diode test, and audible continuity for enhanced functionality. With its compact design and user-friendly interface, it is ideal for both professionals and hobbyists. The multimeter includes automatic ranging, which simplifies operation by eliminating the need to manually adjust settings. Its large LCD display ensures clear readability of results, even in low-light conditions. Additional features such as auto power-off conserve battery life, while the included protective case provides durability. The Cen-Tech Digital Multimeter is a cost-effective solution for a wide range of electrical and electronic measurements, making it a reliable choice for various applications. Its robust construction and comprehensive features ensure accurate and reliable results.
The Cen-Tech Digital Multimeter offers a wide range of measurement functions to cater to various electrical and electronic needs. It can measure both DC and AC voltage, providing accurate readings for circuit analysis. The device also supports current measurement, with capabilities for both DC and AC currents, essential for diagnosing electrical flows. Resistance measurement is another key function, allowing users to test the opposition in circuits. Additionally, the multimeter includes a continuity test feature, which emits a beeping sound when a complete circuit is detected, simplifying the identification of short circuits or faulty connections. These functions make the Cen-Tech Digital Multimeter a comprehensive tool for troubleshooting and maintaining electrical systems, ensuring precise and reliable results for both professionals and enthusiasts. Its versatility and accuracy make it an indispensable asset in any workshop or toolbox. The Cen-Tech Digital Multimeter boasts impressive technical specifications, ensuring precise measurements across various electrical parameters. For voltage, it supports both DC and AC with a range of 0.1mV to 1000V, offering high accuracy. Current measurement ranges from 0.1mA to 10A, catering to both low and high-current applications. Resistance measurement spans from 0.1Ω to 20MΩ, ideal for diagnosing circuit faults. The multimeter also features capacitance measurement (0.1nF to 100μF) and frequency measurement (1Hz to 10MHz), adding to its versatility. With a resolution of 0.1mV and a sampling rate of 10ms, it delivers reliable results. Additional features include auto-ranging and data hold, enhancing user convenience. These specifications make the Cen-Tech Digital Multimeter a reliable tool for professionals and hobbyists alike, ensuring accurate and efficient measurements in diverse scenarios.
The Cen-Tech Digital Multimeter includes a range of additional functions to enhance its versatility. The continuity test function emits an audible tone when it detects a complete circuit, making it ideal for quick diagnostics. The diode test function allows users to verify the integrity of diodes, ensuring they function correctly in both forward and reverse bias modes. Additionally, the multimeter supports frequency measurement, providing accurate readings of signal frequencies up to 10MHz. These advanced features make it a comprehensive tool for troubleshooting and repairing electronic circuits. With these functions, users can identify faults efficiently, streamline their workflow, and ensure precise measurements in various applications. The combination of these features solidifies the multimeter’s position as a valuable asset for both professionals and enthusiasts. To use the Cen-Tech Digital Multimeter, select the appropriate measurement mode, connect the test leads, and ensure proper contact with the circuit. Always follow safety guidelines. The Cen-Tech Digital Multimeter features an intuitive interface with a clear LCD display and a rotary selector for mode and range adjustments. The display shows measured values, unit symbols, and active mode indicators. Below the screen, a series of buttons allows for quick access to functions like HOLD (freezing measurements) and REL (relative measurements). The rotary dial on the front enables users to select measurement modes (Voltage, Current, Resistance, etc.) and adjust sensitivity. Dedicated buttons for Range and Mode simplify navigation. The multimeter also includes a backlit display for improved visibility in low-light conditions. Understanding the controls ensures accurate and efficient measurements. Always refer to the display indicators to confirm the active mode and range. Proper use of the controls enhances safety and precision during testing. Selecting the right measurement mode is crucial for accurate readings. Use the rotary dial to choose between modes such as Voltage (DC/AC), Current (DC/AC), Resistance, Capacitance, and Frequency. Ensure the mode matches the type of measurement needed. For example, select DC Voltage for battery testing or AC Voltage for household outlets. The multimeter also features a Continuity Test mode for checking circuit connections and a Diode Test mode for semiconductor testing. Always verify the mode selection before taking measurements to avoid incorrect readings or potential damage. Additional functions like Auto Range simplify measurements by automatically adjusting the scale. Misselecting the mode can lead to inaccurate results or device damage. Refer to the display indicators to confirm the active mode. Proper mode selection ensures safety and accuracy during testing. To measure voltage, set the multimeter to the appropriate mode: DC Voltage (V) or AC Voltage (V), depending on the source. For DC voltage, ensure the polarity is correct. Connect the black probe to the negative terminal and the red probe to the positive terminal. For AC voltage, polarity does not matter. Select the correct range to avoid damage and ensure accuracy. Use the Auto Range feature for simplicity. Turn the rotary dial to the desired voltage function and verify the mode on the display. Hold the probes firmly on the test points to obtain a stable reading. Avoid measuring voltages exceeding the multimeter’s rated capacity. High voltages can be hazardous, so exercise caution. Use insulated probes and avoid touching exposed metal parts. After measurement, disconnect the probes and switch off the device; For models like the Cen-Tech 98025 or 63758, refer to the manual for specific voltage measurement guidelines.
To measure current, switch the multimeter to the current mode: DC (A) or AC (A). Select the appropriate range based on the expected current level. For higher currents, use the 10A terminal. Connect the black probe to the common terminal and the red probe to the appropriate current terminal. Ensure the circuit is powered off before connecting. For DC current, observe polarity: black probe to negative, red probe to positive. For AC current, polarity does not matter. Turn the dial to the selected current function and confirm on the display. Hold the probes securely to avoid inaccurate readings. Be cautious, as high currents can cause damage or safety risks. Use the Auto Range feature if available. After measurement, disconnect the probes and switch off the device. For detailed instructions, refer to the Cen-Tech multimeter manual specific to your model, such as the 98025 or 63758. Always follow safety guidelines to prevent injury or equipment damage. To measure resistance, set the multimeter to the resistance (Ω) mode. Ensure the device being tested is powered off to avoid inaccurate readings. Select the appropriate range based on the expected resistance value. Connect the black probe to the common terminal and the red probe to the voltage terminal. Touch the probes to the component or circuit points, ensuring good contact. The multimeter will display the resistance value. For precise measurements, use the Auto Range feature if available. Avoid measuring resistance in live circuits to prevent damage or safety risks. For components like diodes, use the diode test function instead. Refer to your specific Cen-Tech multimeter model manual (e.g., 98025 or 63758) for detailed instructions. Always follow safety guidelines to ensure accurate results and prevent equipment damage. Proper handling and storage are essential for maintaining the multimeter’s accuracy. The continuity test function on your Cen-Tech digital multimeter is designed to check for a complete electrical path in a circuit. To use this feature, first, ensure the multimeter is set to the continuity mode, often marked with a diode or sound wave symbol. Insert the black lead into the common (COM) port and the red lead into the voltage (V) port. With the circuit powered off, touch the probes to the two points you wish to test. If there is continuity, the multimeter will emit a beep, indicating a complete path. If no sound is heard, there is likely a break in the circuit. Avoid testing continuity on live circuits to prevent damage or false readings. The continuity function typically ignores small resistances, focusing solely on the presence of a complete path. For specific instructions, refer to your Cen-Tech multimeter manual (e.g., models 98025 or 63758). Always follow safety guidelines to ensure accurate results and prevent equipment damage. Proper handling and storage are crucial for maintaining the multimeter’s accuracy. To measure capacitance, select the capacitance mode on your Cen-Tech digital multimeter. Ensure the circuit is powered off and discharge any capacitors to avoid damage. Connect the black lead to the common (COM) port and the red lead to the voltage (V) port. Touch the probes to the capacitor’s terminals, observing the reading on the display. For accurate results, ensure no other components are connected to the capacitor. For frequency measurement, switch to frequency mode. Connect the multimeter to the signal source, ensuring the circuit is safe to measure. The multimeter will display the frequency in Hz. Always refer to your specific model’s manual (e.g., Cen-Tech 98025) for detailed instructions, as capabilities may vary. Proper handling and calibration are essential for precise measurements. Avoid high-voltage circuits to prevent damage to the multimeter. To test a diode, select the diode test mode on your Cen-Tech digital multimeter. Connect the black lead to the common (COM) port and the red lead to the voltage (V) port. Touch the probes to the diode’s terminals. A forward voltage (typically 0.4-0.7V) indicates a functional diode, while a high reading suggests an open circuit. Reverse bias should show an open circuit. For transistors, use the transistor test mode. Connect the appropriate terminals to the multimeter’s ports as indicated in your manual (e.g., Cen-Tech 98025). The multimeter will display the transistor’s current gain (hFE). A low or zero reading indicates a faulty transistor. Ensure the transistor is disconnected from the circuit during testing. Always refer to your specific model’s instructions for precise steps, as test modes may vary. Proper handling prevents damage to both the multimeter and the component being tested. Common issues include low battery, incorrect mode selection, or faulty leads. Replace the 9V battery if the display dims. Use error codes for diagnostics. Regularly clean the multimeter and store it in a dry place to maintain accuracy. Common issues with the Cen-Tech digital multimeter include inaccurate readings, battery drain, or error codes. For inaccurate readings, ensure leads are clean and properly connected. If the multimeter shows “OL” or “E1,” it may indicate overload or faulty connections. Replace the 9V battery if the display dims or measurements fluctuate. For error codes like “E2,” recalibrate the device as outlined in the manual. If the multimeter fails to power on, check the battery compartment for corrosion or loose connections. Avoid using damaged test leads, as they can cause inconsistent results. Regularly clean the multimeter’s contacts with a soft cloth to maintain accuracy. For persistent issues, refer to the troubleshooting guide or contact manufacturer support. Proper maintenance and adherence to safety guidelines will extend the lifespan of your multimeter and ensure reliable performance. Always follow the manufacturer’s instructions for repairs or replacements. The Cen-Tech digital multimeter displays error codes to indicate specific issues. For instance, “OL” signifies an open circuit or overloaded input, while “E1” or “E2” may point to faulty connections or internal errors. If “E3” appears, it could indicate a defective fuse or sensor malfunction. “E4” often relates to temperature measurement issues, suggesting improper thermocouple connections. “E5” indicates a low battery, requiring replacement. “E6” or “E7” may signify overrange or invalid settings for the selected mode. To resolve these, ensure all connections are secure, replace fuses or batteries as needed, and verify the correct mode is selected. Always refer to the manual for specific solutions, as some codes may require calibration or professional assistance. Regular maintenance and proper handling can prevent many of these errors. To replace the battery in your Cen-Tech digital multimeter, first ensure the device is powered off and all test leads are removed. Open the battery compartment, usually located on the rear or side, by sliding it open or unscrewing it. Carefully remove the old 9V battery and discard it properly. Insert the new 6F22 or equivalent 9V battery, ensuring the terminals align correctly. Close the compartment securely. If the battery is low or drained, the multimeter may display an error code like “E5.” Always use the recommended battery type to maintain performance. Avoid touching bare metal parts of the multimeter or test leads during replacement to prevent static discharge. After replacing the battery, turn the multimeter on to verify it powers up correctly. Proper battery replacement ensures accurate measurements and extends the device’s lifespan. Calibrating your Cen-Tech digital multimeter ensures accurate measurements over time. Before calibration, ensure the battery is fresh or fully charged. For models with adjustable calibration, locate the calibration knobs or screws, typically found on the rear or underside. Use a small screwdriver to adjust the “Zero Adjust” or “Calibrate” knob while in continuity or resistance mode. Some models may require connecting the test leads to a known reference value, such as a precision resistor, to fine-tune accuracy. For auto-calibrating multimeters, follow the on-screen prompts to complete the process. Avoid opening the device for internal adjustments unless you are experienced. Improper calibration can lead to measurement inaccuracies. Always refer to the specific instructions for your model, as calibration procedures may vary. Regular calibration ensures reliable performance and extends the multimeter’s operational lifespan. Regular cleaning and maintenance are crucial to ensure the longevity and accuracy of your Cen-Tech digital multimeter. Use a soft, dry cloth to wipe the exterior and display screen, removing dirt or fingerprints. For stubborn smudges, a slightly damp cloth may be used, but avoid any harsh chemicals. Inspect the test leads and probes for damage or corrosion; replace them if necessary. Store the multimeter in a dry, cool environment, away from direct sunlight. Avoid exposing it to extreme temperatures or humidity. Clean the input terminals with a soft brush or compressed air to remove dust or debris. Always turn off the multimeter before cleaning to prevent accidental activation. Proper maintenance ensures reliable performance and protects your investment. Regularly check the battery compartment for corrosion and ensure all connections are secure. By following these steps, you can maintain your multimeter in optimal condition. For further assistance, access the full instruction manual, online tutorials, and manufacturer support. Warranty information and troubleshooting guides are also available to help you make the most of your multimeter. To access the full instruction manual for the Cen-Tech Digital Multimeter, visit the manufacturer’s official website or authorized distributors. Many models, such as the Cen-Tech 98025 or 92020, have downloadable PDF manuals available. Simply search for the specific model number along with “manual” to find the relevant document. Additionally, the manual may be included as a digital copy with your purchase or available through the manufacturer’s customer support portal. Ensure you refer to the correct manual for your device, as features and specifications may vary across models. If you cannot locate the manual online, contact Cen-Tech’s customer service for assistance. Always refer to the official manual for accurate and detailed instructions to ensure safe and proper use of your multimeter. This resource is essential for understanding all functions and troubleshooting common issues. To enhance your understanding of the Cen-Tech Digital Multimeter, numerous online resources are available. Video tutorials on platforms like YouTube provide step-by-step demonstrations for various functions, from basic measurements to advanced features. Additionally, forums and technical communities share user experiences and tips for troubleshooting. Websites like Harbor Freight Tools and other electronics forums often host detailed guides specific to Cen-Tech models, such as the 98025 or 92020. These resources are particularly helpful for understanding complex features like capacitance and frequency measurement. You can also find interactive simulations and PDF guides that complement the instruction manual. For beginners, these tutorials offer a practical approach to mastering the multimeter’s capabilities. Always verify the credibility of the source to ensure accuracy. These online tools are invaluable for both novice and experienced users seeking to maximize their device’s potential. For assistance with your Cen-Tech Digital Multimeter, contact Harbor Freight Tools directly. Their customer service team is available to address technical inquiries, troubleshooting, and warranty-related issues. You can reach them at 1-888-866-5797. Additionally, visit their official website for support resources, FAQs, and downloadable manuals. Ensure to have your multimeter’s model number, such as 98025 or 92020, ready for faster assistance. For international users, refer to the manufacturer’s regional contact details provided in the manual. Manufacturer support is crucial for resolving complex issues and ensuring optimal device performance. Always verify the authenticity of the support channel to avoid unauthorized services. By utilizing these resources, you can maintain your multimeter’s functionality and extend its lifespan. The support team is dedicated to providing timely and effective solutions to enhance your user experience. The Cen-Tech Digital Multimeter is backed by a limited warranty provided by Harbor Freight Tools. The warranty period varies by model but typically covers defects in materials and workmanship for a specified duration, such as one year from the date of purchase. During this period, defective units may be repaired or replaced free of charge, subject to warranty terms. However, the warranty does not cover damage resulting from misuse, improper handling, or unauthorized repairs. For warranty claims, contact Harbor Freight Tools at 1-888-866-5797 or visit their official website. Ensure to have your purchase receipt and model number (e.g., 98025 or 92020) ready for verification. Keep the receipt and manual for warranty validation. Unauthorized modifications or tampering will void the warranty. Always refer to the manufacturer’s terms for detailed conditions and exclusions. Proper use and maintenance ensure warranty coverage remains valid.3.2 Measurement Functions (Voltage, Current, Resistance, etc.)


3.3 Technical Specifications and Range Details
3.4 Additional Functions (Continuity, Diode Test, etc.)

How to Use the Multimeter
4.1 Understanding the Multimeter Controls and Display
4.2 Selecting the Correct Measurement Mode
4.3 Measuring Voltage (DC and AC)
4.4 Measuring Current (DC and AC)
4.5 Measuring Resistance
4.6 Using the Continuity Test Function
4.7 Measuring Capacitance and Frequency
4.8 Diode and Transistor Testing

Troubleshooting and Maintenance
5.1 Common Issues and Solutions

5.2 Error Codes and Their Meanings
5.3 Replacing the Battery
5.4 Calibrating the Multimeter

5.5 Cleaning and Maintaining the Multimeter

Additional Resources
6.1 Accessing the Full Instruction Manual
6.2 Online Tutorials and Guides
6.3 Manufacturer Support and Contact Information
6.4 Warranty Information